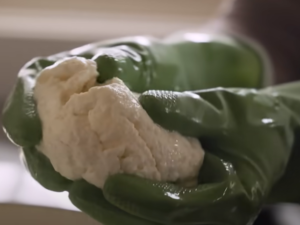
Making Mozzarella Cheese at Home
Making mozzarella cheese at home is a rewarding culinary adventure that brings fresh, creamy, and flavorful cheese straight to your kitchen. While the process might seem daunting at first, mozzarella is one of the easiest cheeses to make, requiring just a few ingredients and tools. Plus, the satisfaction of pulling and shaping your own soft cheese is well worth the effort. Whether you’re a seasoned home cook or a curious beginner, making mozzarella at home is a fun and tasty experience.
Ingredients and Tools
To make mozzarella cheese at home, you’ll need the following ingredients:
- 1 gallon of whole milk (preferably non-homogenized and pasteurized, though raw milk works even better if available)
- 1 1/4 teaspoons of citric acid
- 1/4 teaspoon of liquid rennet (or a 1/4 tablet of rennet, dissolved in water)
- 1 teaspoon of salt
- Water (divided into 1 cup and 1/4 cup)
The tools you will need include:
- A large, non-reactive pot (stainless steel works best)
- A slotted spoon
- A thermometer (capable of reading between 80°F and 110°F)
- A knife for cutting the curd
- A microwave-safe bowl
- Cheesecloth (optional)
Step-by-Step Process
1. Prepare the Milk
Start by pouring the gallon of milk into the large pot and placing it on medium-low heat. Stir in 1 1/4 teaspoons of citric acid, which has been dissolved in a cup of water. The citric acid helps the milk curdle properly, forming the base for the mozzarella. Heat the milk gently to 90°F, stirring occasionally to keep the heat even.

2. Add Rennet and Form Curds
Once the milk reaches 90°F, it’s time to add the rennet. If you’re using liquid rennet, dissolve 1/4 teaspoon of it in 1/4 cup of water and pour this mixture into the pot. Stir the milk gently for about 30 seconds, then stop and let the milk sit undisturbed. Rennet helps the milk proteins coagulate, separating the curds (the solids) from the whey (the liquid).
After about 5–10 minutes, you should see a gel-like mass forming, which is the curd. Test for a “clean break” by gently pressing a knife into the curd—if it breaks cleanly and separates from the whey, it’s ready to cut.
3. Cut the Curds
Using a long knife, cut the curd into a grid pattern, creating small cubes about an inch wide. Allow the curds to rest for another 5 minutes after cutting. This helps them firm up.
4. Heat and Stir the Curds
Slowly heat the pot to 105°F, gently stirring the curds as they cook. The curds will begin to shrink as they release more whey. Keep stirring gently for 3–5 minutes until the curds firm up slightly and the whey becomes more distinct.
5. Separate Curds from Whey
Once the curds have firmed up, turn off the heat and use a slotted spoon to scoop them out into a microwave-safe bowl. Press the curds gently with your hands or a spoon to drain off as much whey as possible. You can save the whey for other recipes like bread or use it to feed plants—it’s full of nutrients!
6. Microwave and Knead
Microwave the curds for 1 minute on high. Drain any excess whey, and then microwave for another 30 seconds. The cheese should now start to come together in a stretchy, smooth ball. Sprinkle in 1 teaspoon of salt (or more to taste), and start to knead the cheese like bread dough, stretching and folding it over itself. If the curds cool down too quickly and become difficult to stretch, microwave for another 30 seconds to warm them up.
The key here is the stretching: mozzarella gets its characteristic texture from being stretched and folded multiple times, which aligns the proteins and gives it that lovely elastic quality.
7. Shape the Mozzarella
Once the cheese is smooth and stretchy, shape it into a ball or log, depending on your preference. You can also make smaller, bocconcini-style balls for snacks or salads. If you like, dip the finished mozzarella in cold water for a minute to firm it up and cool it down.
8. Enjoy!
Your homemade mozzarella is ready to eat! Fresh mozzarella is best consumed right away while it’s still soft and milky, but you can also store it in the fridge in an airtight container for up to a week. If storing, keep it in a bit of the leftover whey or a brine to maintain moisture.
Tips and Variations
- Experiment with Milk: Different types of milk produce different textures and flavors. While whole milk is ideal, try experimenting with goat or buffalo milk for a unique twist on classic mozzarella.
- Add Herbs: During the stretching and kneading process, sprinkle in some fresh herbs like basil or thyme for an added layer of flavor.
- Brine It: To store mozzarella longer, make a simple brine by dissolving salt in water, and submerge the cheese in the solution. This keeps it moist and flavorful.
Making mozzarella cheese at home is not only satisfying but also opens up a world of creative possibilities in the kitchen. From pizzas to salads or simply enjoyed on its own, the flavor of fresh, homemade mozzarella is unbeatable.


